In recent years the Ronnie rig has been one of the most widely used rigs in Carp fishing all over the world. If you speak to any keen carp angler and the chances are they’ve cast a Ronnie rig out at some point. But what is it that makes this rig so popular? The versatility of the rig for starters.
Also read How to tie a Zig Rig and The Chod Rig: All you need to know
When should I use a Ronnie Rig?
The Ronnie rig can truly do it all, from fishing a lead clip on the deck with a bottom bait or a wafter over cleaner ground such as gravel or clay, to fishing a pop-up over silt or weed with a helicopter set up. It really can be used in almost every situation with every lead setup, but that isn’t the sole reason why it is so popular.
Rotation: 360 Degrees
The Ronnie is also an extremely effective rig due to its ability
to rotate 360 degrees. The hook is mounted directly to a small ring swivel
which enables it to have full movement, this in turn makes it extremely
difficult for a carp to deal with. The hook cannot be ejected from the Carp’s
mouth easily resulting in far more fish hooked and landed. You may think that’s
all you need to hear to have you hooked on the Ronnie rig but there’s more to
why this rig is so popular, and that’s how incredibly simple this rig is to
tie. That and the fact you can just change the hook rather than the whole rig which
saves you time and rig materials when just a new hook is required.

This is how you make a Ronnie Rig set up
Now that I've explained how effective the Ronnie Rig for carp fishing is, how versatile it is, and lastly how it can be used in almost any situation I’ll take you on a step-by-step guide on how to tie a Ronnie Rig lead setup.
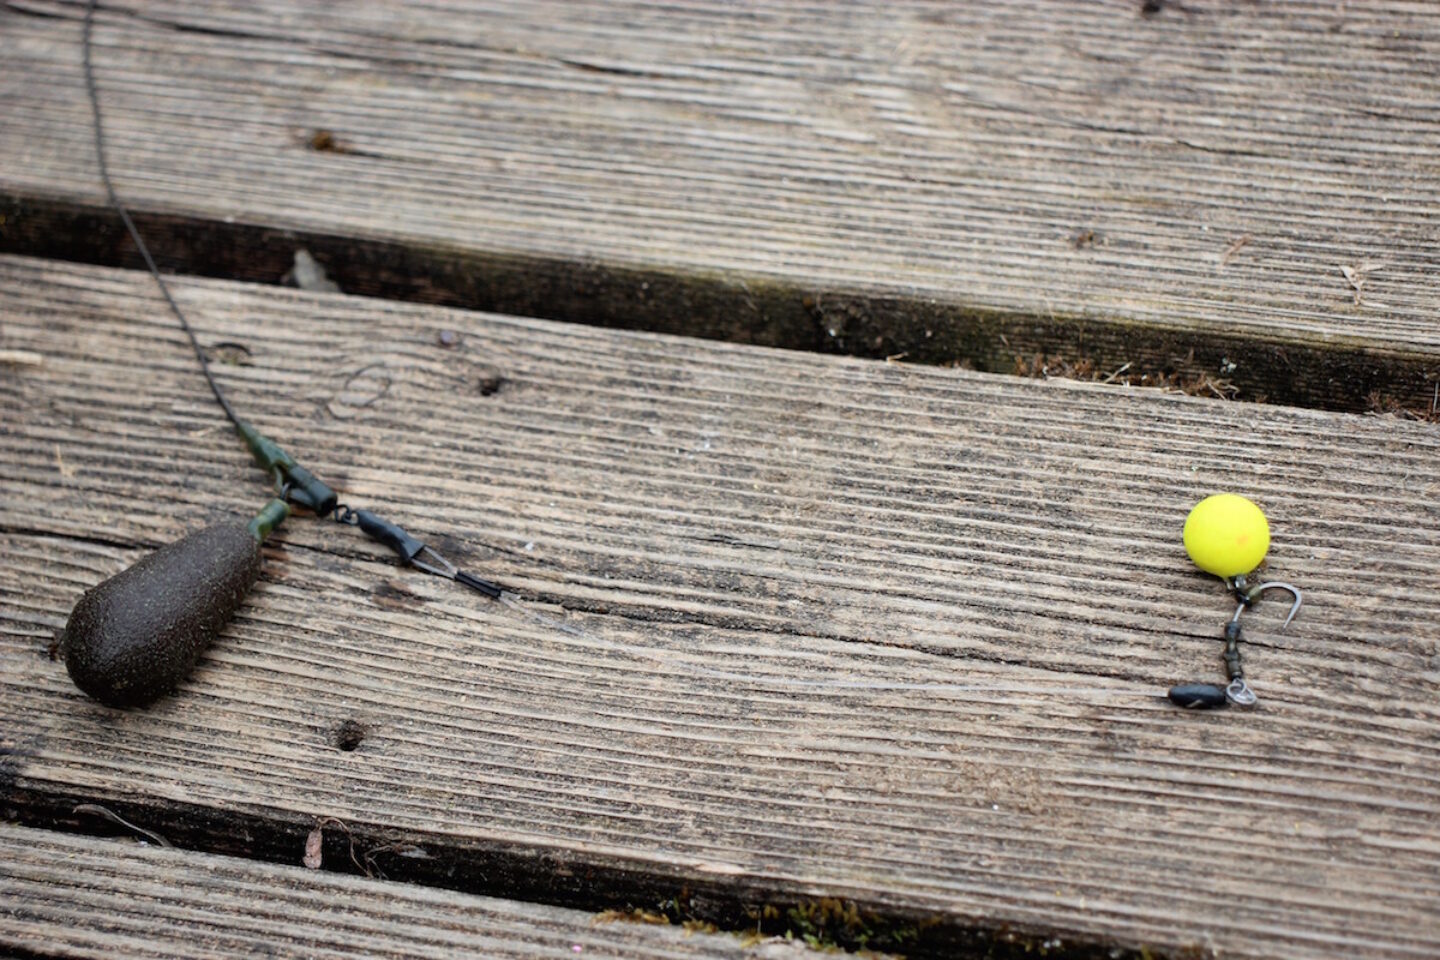
Firstly, you need to take your chosen boom material, this is personal preference and can be a coated braid or more commonly used a stiff fluorocarbon to help minimise tangles. Take your chosen material and cut off a length of around 8 inches. On one end tie a figure of 8 loop knot and trim the tag end.

Secondly, get a size 11 quick change swivel and tie your other
end of boom material to this using a 4 turn blood knot trimming your tag end
afterwards. You now have your boom constructed, these can be used over and over
again with just the hook needing replacing.
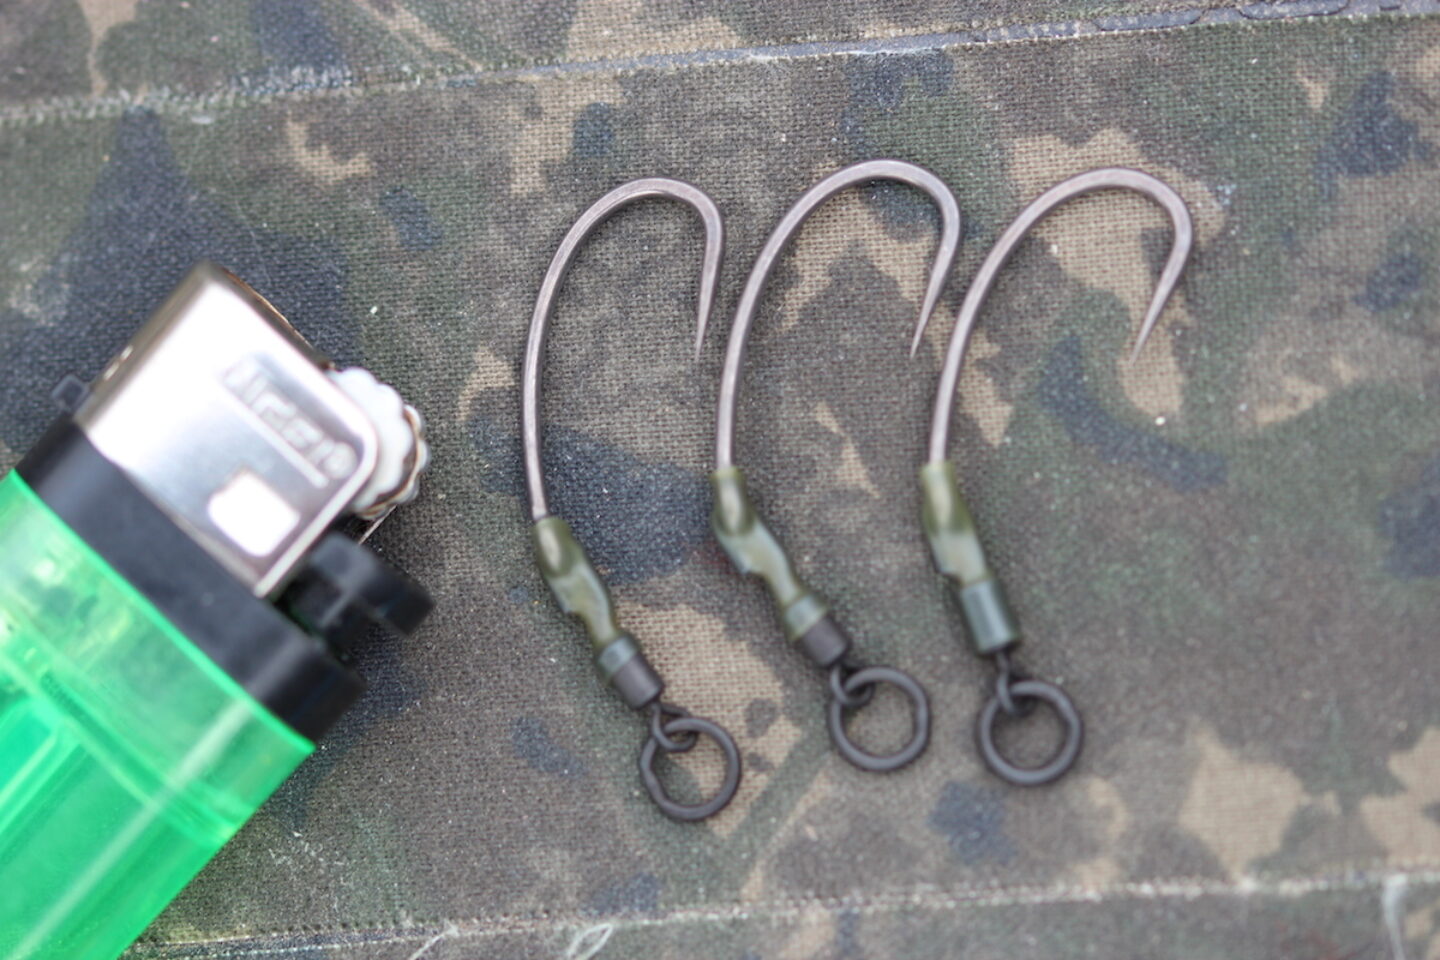
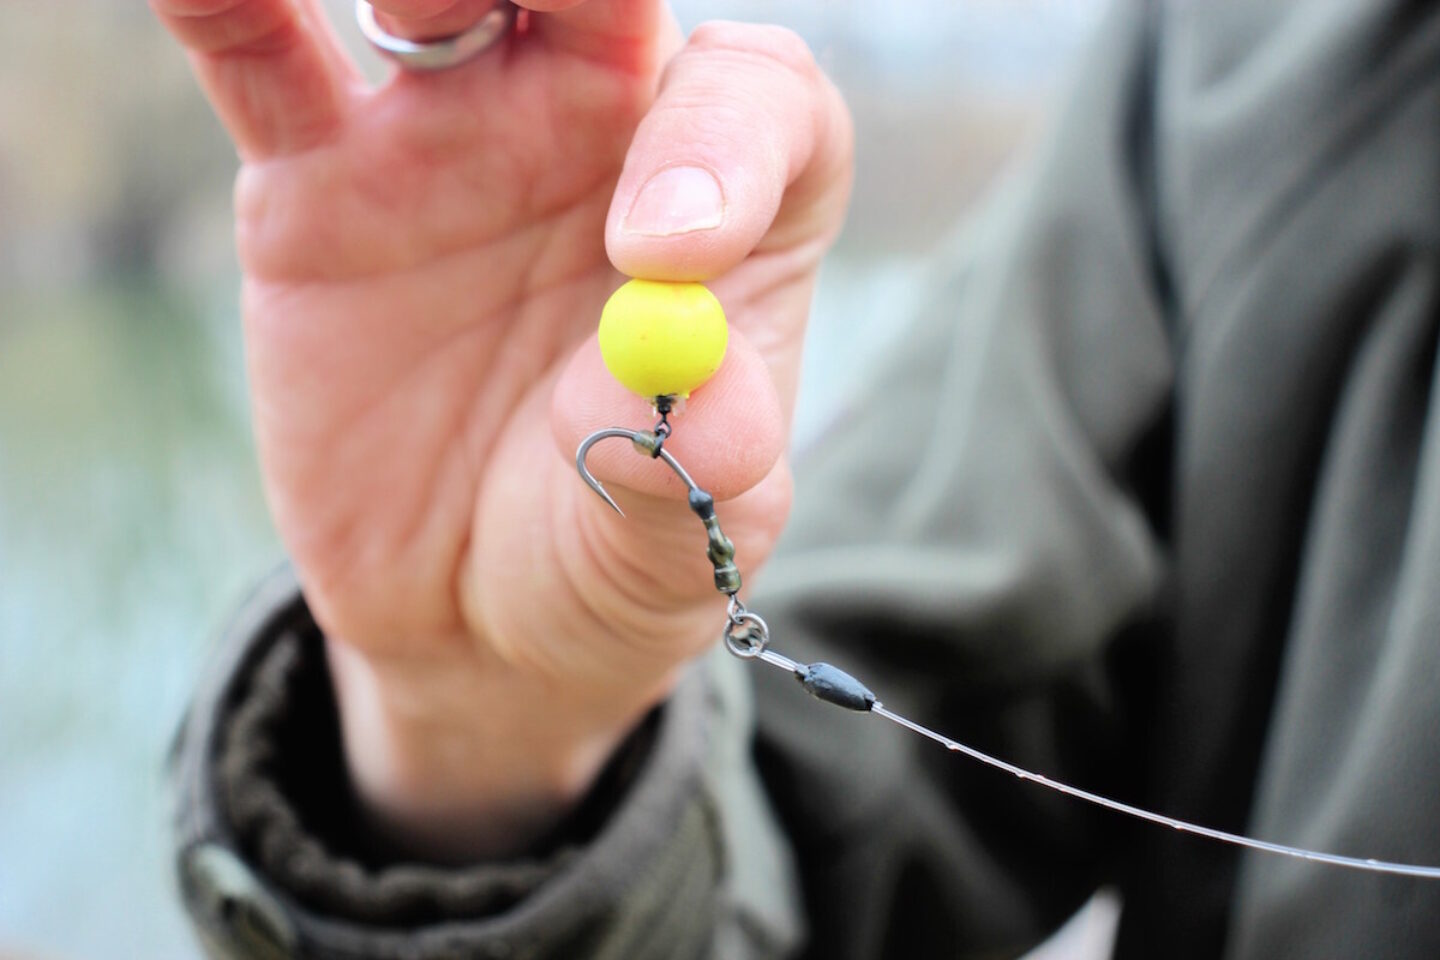
Next you're going to want to ever so slightly open the quick change swivel opening, just wide enough so you can pass the eye of your chosen carp hook through it. Therefore, attaching your hook to your boom material. (There are various companies that now make dedicated Ronnie Rig swivels, so keep your eye out for them as they can make your life a little easier).

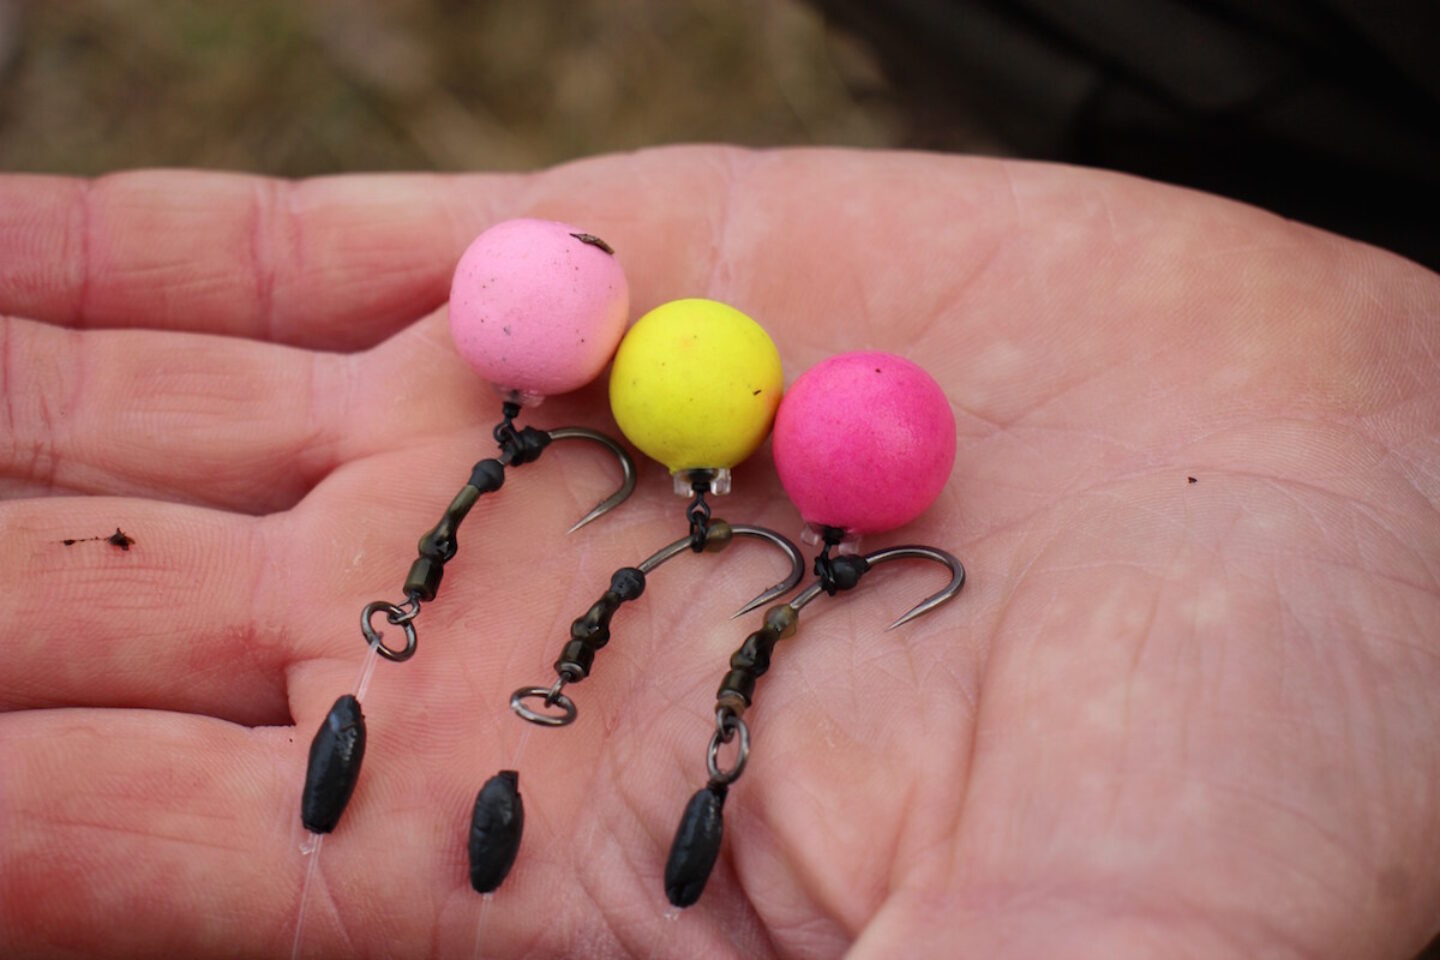
Now your hook is attached to your boom material you are almost there. Either use a specific Ronnie fishing rig kicker or alternatively take a piece of shrink tube and cut of around 2cm thread this over the point of the hook being careful not to pierce it with the hook point, and pull all the way down the shank of the hook so its half over the quick change swivel and over the eye of the hook. Steam this into place locking the hook in position so it can’t come off until you want to take it off.
Now slide a micro ring swivel down the shank of the hook and lock into place using a hook bead. Position the hook bead opposite the barb on the hook just before the bend. Lastly, place a small amount of tungsten putty over the blood knot on your boom this will make sure it sinks with a pop-up and keeps everything pinned down.